
Happy Friday to all of my lovely ladies! I am, most likely, sipping on a mimosa at the airport with C (trying to get him as drunk as possible so he'll actually get ON the plane), preparing for our flight to Key West right now. My plan is to enter a total and complete zone of relaxation [see also: white girl wasted] on this vacay so I'm going to hand the mic over to a lovely lady I met via Instagram, over our love of nail polish, and let her take the stage here on my blog today.
Take it away, Elise!
______________
Hello Everyone!
My name is Elise, and I just started a blog called The Painted Desert. I am a 27 year old wife and mom. I got into nail polish and doing my nails about a year ago, and this is my first venture into the blogosphere.
Today I'm going to be showing you how I do french tips. When I wear them, I get a lot of compliments & comments from people who think I have fake nails, or don't believe I did them myself! Now, I'm not one for the traditional white french tip, I prefer a "funky french". I usually incorporate a colored tip and stamping!

First, start off by painting your nails with your favorite base coat (I use OPI Nail Envy for sensitive and peeling nails), and then a french manicure base to hide any staining and make your nails look perfect (I use Orly Rose Colored Glasses). You can see a slight bit of yellowing on my nail here, but that is not visible outside of photos.

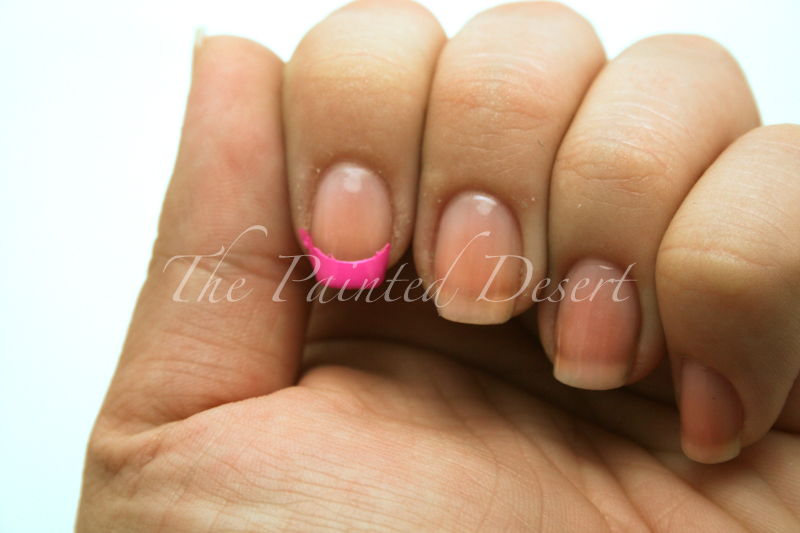
Second, place a notebook paper reinforcement where you would like your french tip to be. I do mine right at the natural curve of my nail, so my tips look natural.

Next, paint the tip of your nail with your desired polish (I used Color Club Peppermint Twist). It is best to use a polish that is opaque in 1 or 2 coats. Before the polish has dried, quickly remove the hole reinforcement. You will be left with a clean line.

Complete the rest of your nails, and seal with topcoat when they are dry

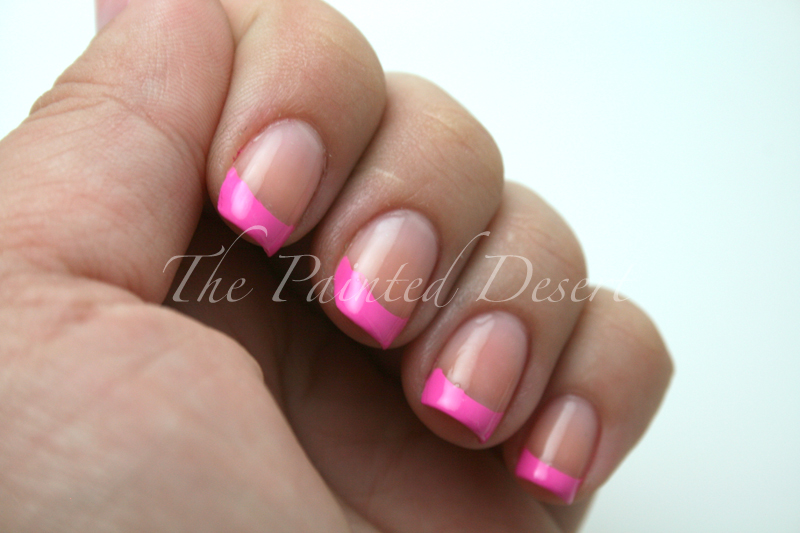
Now, you can stop here, but why would you?! I added 1 coat of China Glaze Fairy Dust, and stamped a flower image from BM 311 in Konad White


This is a quick, easy way to do a professional looking french tip without having to free hand it or sit at the salon. I hope you all enjoyed my tutorial, I really enjoyed sharing it with you!
Thank you Whitney for having me, and giving me an opportunity to share my nails with your readers!! <3
Love this! Can't wait to try it out!
ReplyThank you very much! It's so easy, I hope you do!
Wow, you must have a very steady hand because I think if I tried this I would have polish all over my fingers especially on my right one :) It looks super great though!
ReplyI got a little bit of polish on my skin, but all you have to do is dip a small brush in acetone and clean up your cuticles and fingers. Thank you for your positive comments!
This is a great tutorial! I cannot wait to try it!!
ReplyThank you so much!
cute blog!
ReplyNew follower :)
Look forward to continue reading your blog!
xo
christina
livinglaughinglovingx3.blogspot.com
Love it! So cute and girly, and looks like something even I could do! Minus the stamping that is, lol.
Reply